It's that time of year when you start decorating for fall. From now until the end of the year we will be constantly decorating for some holiday or season. I know people aren't going to like this but it is about time to start thinking of Christmas decorating. But today it is fall. This initial is on my craft room door. You could change it a little and even put it on your front door. The original place I saw it had the initial hanging from an open frame and the whole thing was hanging on the front door.
This didn't turn out exactly like I wanted it but I made it work.
Pick up a wooden initial at one of the craft stores. There are all kinds but you need one that is big. You don't want the width thick because you don't want it heavy.Okay the leaves. There are better leaves out there than these. I couldn't find the ones that I had in mind. There is maple leaves that actually work better. I don't remember where I found these but it was early and they were the first ones. The maple leaves are the same color so you don't have to think about mixing the colors up.
I played around with it before I got the glue out to see how I might want to lay them out.
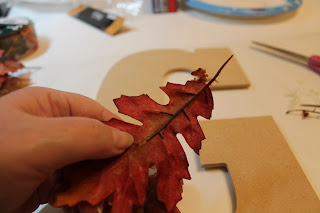
These leaves had a thick stem.
They pull right off so the leaf will lay flat.
Start at one of the ends. You will want the first one to go over the edge at the top. Glue it down. I used hot glue because then you don't have to wait for it to dry.
See how I glued it over the edge. Then angle another one along the edge of the first one.
Work around the letter, covering the edges.
I found some fall ribbon in the drawer that matched pretty good. Measure off double the length you want it to hang down. Glue the ends together.
Then glue it to the back of the letter.
Then hang.


No comments:
Post a Comment